MCP (Model Context Protocol) Explained — All You Need To Know
Updated
TL;DR
MCP (Model Context Protocol) can be called as a buzzword of 2025, except it's not just that. It's a communication protocol launched by Anthropic — the company behind the family of Claude AI models. Almost all major AI companies including Google and OpenAI have embraced MCP and it's on its way to become a standardized way of communication for AI models.
This post is about me exploring what MCP is, building a really basic MCP server, how it works, and why there was a need for it. I'll try to keep the terminology as simple as it gets.
Table of Contents
What is MCP (Model Context Protocol)?
MCP, a.k.a, Model Context Protocol in terms of AI, is a standardized way for AI models to communicate with external tools and applications. As the name suggests, it's a protocol — a way of communication and a set of rules, just like what you have in other protocols, such as HTTP or TCP.
"Think of MCP like a USB-C port for AI applications. Just as USB-C provides a standardized way to connect your devices to various peripherals and accessories, MCP provides a standardized way to connect AI models to different data sources and tools." - modelcontextprotocol.io
MCP Components
MCP follows a client-server architecture, and hence there are two building blocks which are required to facilitate MCP communication: MCP Client and MCP Server.
MCP Client
- It is what talks to an MCP server using the Model Context Protocol.
- An MCP client is often a part of the AI tool you use to interact with an AI model (if it supports MCP, of course).
- You can think of it as a tool which helps in spinning up a connection to the MCP server and talk to it using MCP.
MCP Server
- An MCP server is what handles the requests coming from the AI model (MCP client) and maps them to appropriate tasks which are defined in the server.
- MCP server defines which actions the AI model can perform on the server/tool and which resources it has access to.
- Think of it as a mapper which maps the request with an appropriate action.
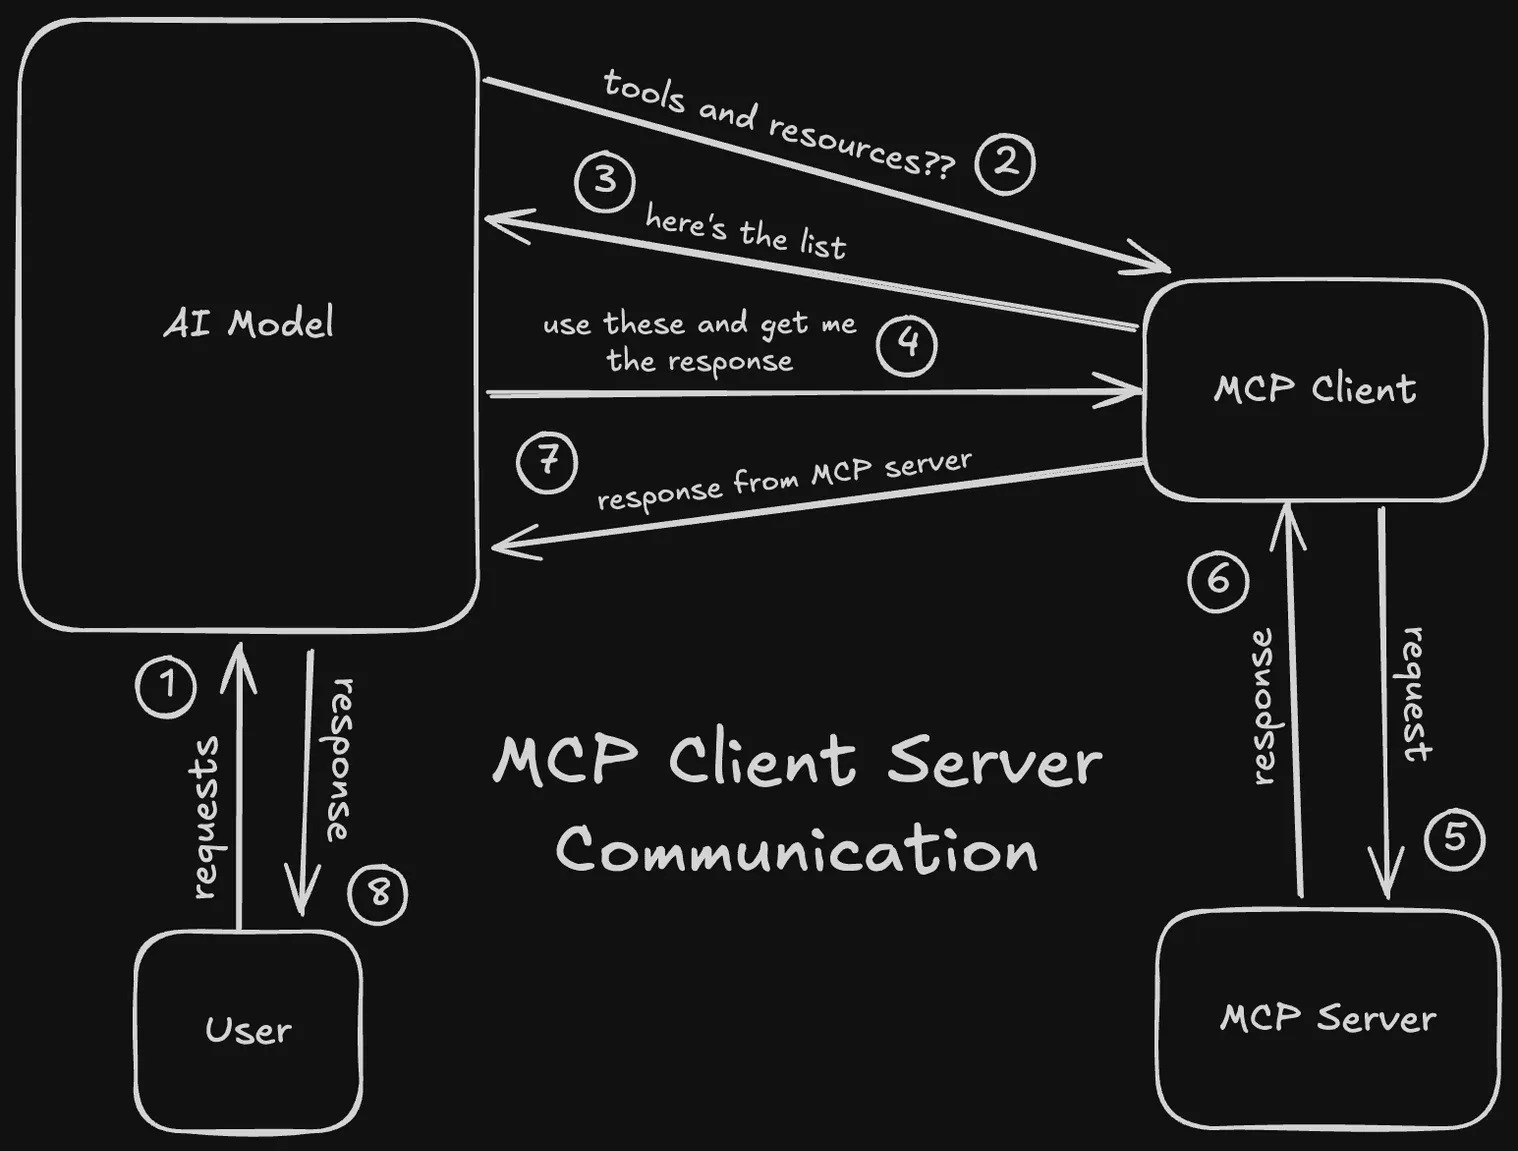
When I send a prompt to an AI tool which supports MCP, for instance, Claude Desktop, the MCP client will go to the AI model (Claude for example), the AI model will think how to proceed with the request and explore all of the available tools and resources, and then it will decide which tools/resources to use and tell the MCP client to talk to the external MCP server to fetch/execute those. Once the MCP client gets the response from the MCP server, it will send that data to the AI model which will re-structure it in a human readable way.
Up until now, I used to ask, well is it any different from an actual API? It's not, but at the same time it is. Let me explain.
Why Do We Need MCP?
As an AI model, if I want to connect to external tools or applications, I need to build an API for it so that the AI model can communicate with the tool or application — that's easy, but note that it's specific to that particular tool or application. If there's another tool which I would like my AI model to use, I have to build a custom interface (API) for that as well.
So, traditionally, what happens is the number of APIs I have to build is directly proportional to the number of tools/applications I want my AI model to use. That's quite cumbersome for an AI company to build and manage. And here's where Anthropic played a smart move.
What Anthropic did was offload the task of building APIs to the developer community, i.e., the external tools and applications. They were like, "Hey, why don't we create a universal protocol that'll be AI model-and-tool-agnostic? Meaning, any AI model supporting it can communicate to any external tool/application which supports the protocol."
That way, AI model providers just have to support MCP and their AI models can communicate with any external tool which also supports MCP. The task of integrating MCP with the application became a job of the application developer and not the AI model provider. It's a win-win for both because they only have to maintain a single interface, that is MCP.
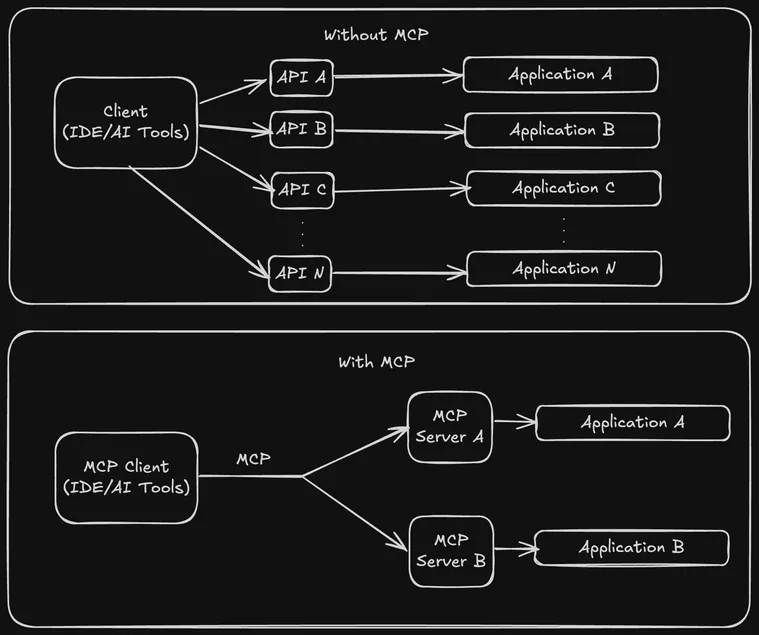
Not only that, third party MCP servers can also be built for a given application. This encourages the developer community to build solutions on top of existing applications using AI without the need to know the specifics about the AI model or platform and vice-versa.
How to Build An MCP Server
An MCP server can define three components:
- Tools: Used to perform an action, execute a function. Similar to PUT/PATCH/DELETE HTTP requests.
- Resources: Data that can be read by MCP clients. Similar to GET HTTP request.
- Pre-defined Prompts: Prompt templates that can be used by LLMs.
MCP servers can be built using Python, Node, Java, Kotlin, and C#. In this tutorial, I am building a basic MCP server using Node (TypeScript).
Pro Tip
Install Typescript and Node, if you haven't done that already.
Install the MCP SDK & Setup Application
Initialize a Node application using npm init -y. Then, install the appropriate SDK depending on your programming language or framework. For me it will be:
npm install @modelcontextprotocol/sdkModify the package.json file to:
- Make the node application a module.
- Including an executable file in the
binfolder using thebinscript. - Set the permissions for the executable file in the
buildscript. - If necessary, include a
filesscript to define which files are included in the final build.
{
  "name": "mcp-demo",
  "version": "1.0.0",
  "type": "module",
  "bin": {
    "mcp-demo": "./dist/index.js"
  },
  "scripts": {
    "ts": "npx tsc",
    "rootFile": "chmod 755 ./dist/index.js",
    "build": "npm-run-all -s ts rootFile"
  },
  "files": [
    "dist"
  ],
  "dependencies": {
    "@modelcontextprotocol/sdk": "^1.10.1",
    "npm-run-all": "^4.1.5",
    "typescript": "^5.8.3"
  }
}
Creating a tsconfig.json file at the root of the project folder is recommended.
{
    "compilerOptions": {
        "target": "ES2022",
        "module": "Node16",
        "moduleResolution": "Node16",
        "outDir": "./dist",
        "rootDir": "./src",
        "strict": true,
        "esModuleInterop": true,
        "skipLibCheck": true,
        "forceConsistentCasingInFileNames": true
    },
    "include": [
        "src/**/*"
    ],
    "exclude": [
        "node_modules"
    ]
}
Create an MCP Server Instance
Create an src folder and in that an index.ts file (you are free to define your own folder structure but make sure to update package.json and tsconfig.json accordingly).
// index.ts
import { McpServer } from "@modelcontextprotocol/sdk/server/mcp.js";
import { StdioServerTransport } from "@modelcontextprotocol/sdk/server/stdio.js";

const server = new McpServer({
    name: "mcp-demo",
    version: "1.0.0",
    capabilities: {
        resources: {},
        tools: {},
        prompts: {},
    }
});

const transport = new StdioServerTransport();
await server.connect(transport);
console.log("Server started and connected to transport.");
A transport type is required by the MCP server to communicate with the MCP client, and that's why the stdio transport type is used. Note that this transport type is only available in Node.
Configure an MCP Client
For this tutorial, I am using Claude Desktop App as an MCP client to communicate with my MCP server, but you are free to use any MCP client you prefer.
First, I need to inform Claude Desktop about my MCP server and give it the path to find it. To do that, I need to modify a configuration file of Claude Desktop. That file exists on the following paths for the following operating systems:
- MacOS & Linux:
~/Library/Application\ Support/Claude/claude_desktop_config.json - Windows:
AppData\Claude\claude_desktop_config.json
Open that file using VSCode from the terminal:
- MacOS & Linux:
code ~/Library/Application\ Support/Claude/claude_desktop_config.json - Windows:
code $env:AppData\Claude\claude_desktop_config.json
Then, once you are able to access and view that file, add a mention of your MCP server as shown below:
{
    "mcpServers": {
        "mcp-demo": {
            "command": "node",
            "args": [
                "/Users/murtuzaalisurti/Documents/Development/MCP Servers/demo/dist/index.js", // absolute path to your MCP server build
            ]
        }
    }
}
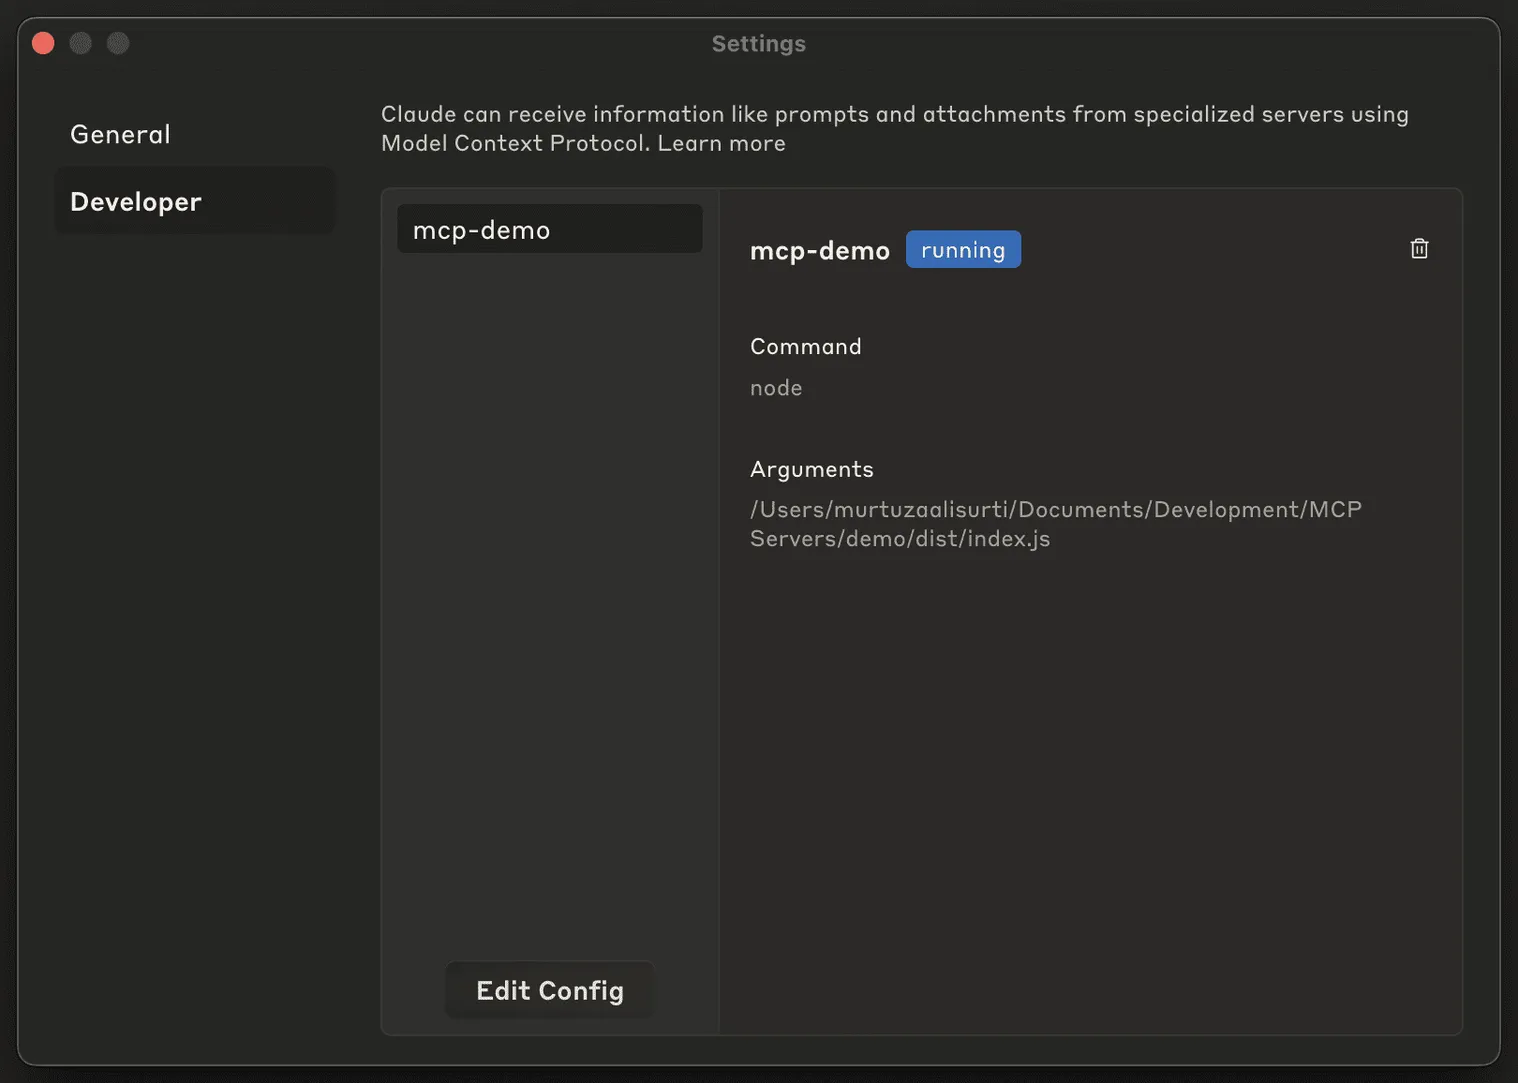
Save the file and restart Claude Desktop. If you encounter an error, go to the Claude App Settings > Developer > Logs.
If the MCP server is correctly configured and registered in Claude Desktop, you wouldn't get any errors and you can verify the MCP server is running by going to Claude App Settings > Developer > [MCP Server Name] — it should have a running status.
Use the MCP Server
In Claude Desktop, after you connect your MCP server, you should see a plug icon if you have defined resources in your MCP server. That allows you to attach the data from those resources to the AI model context.
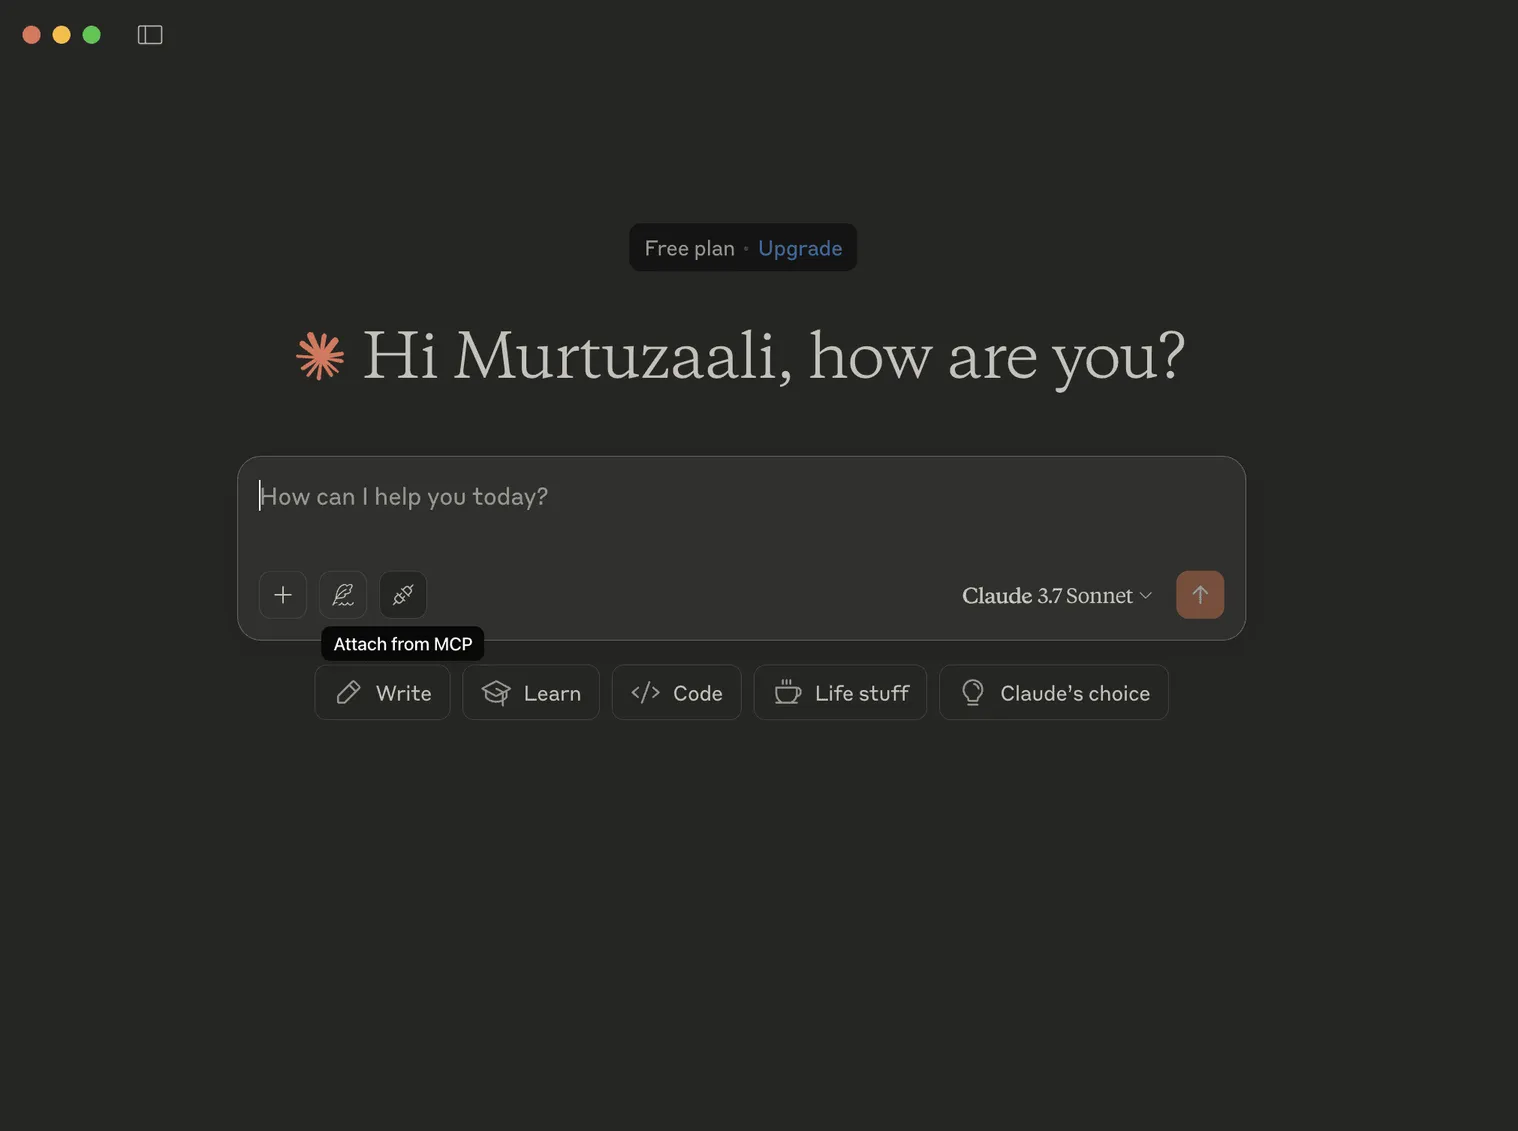
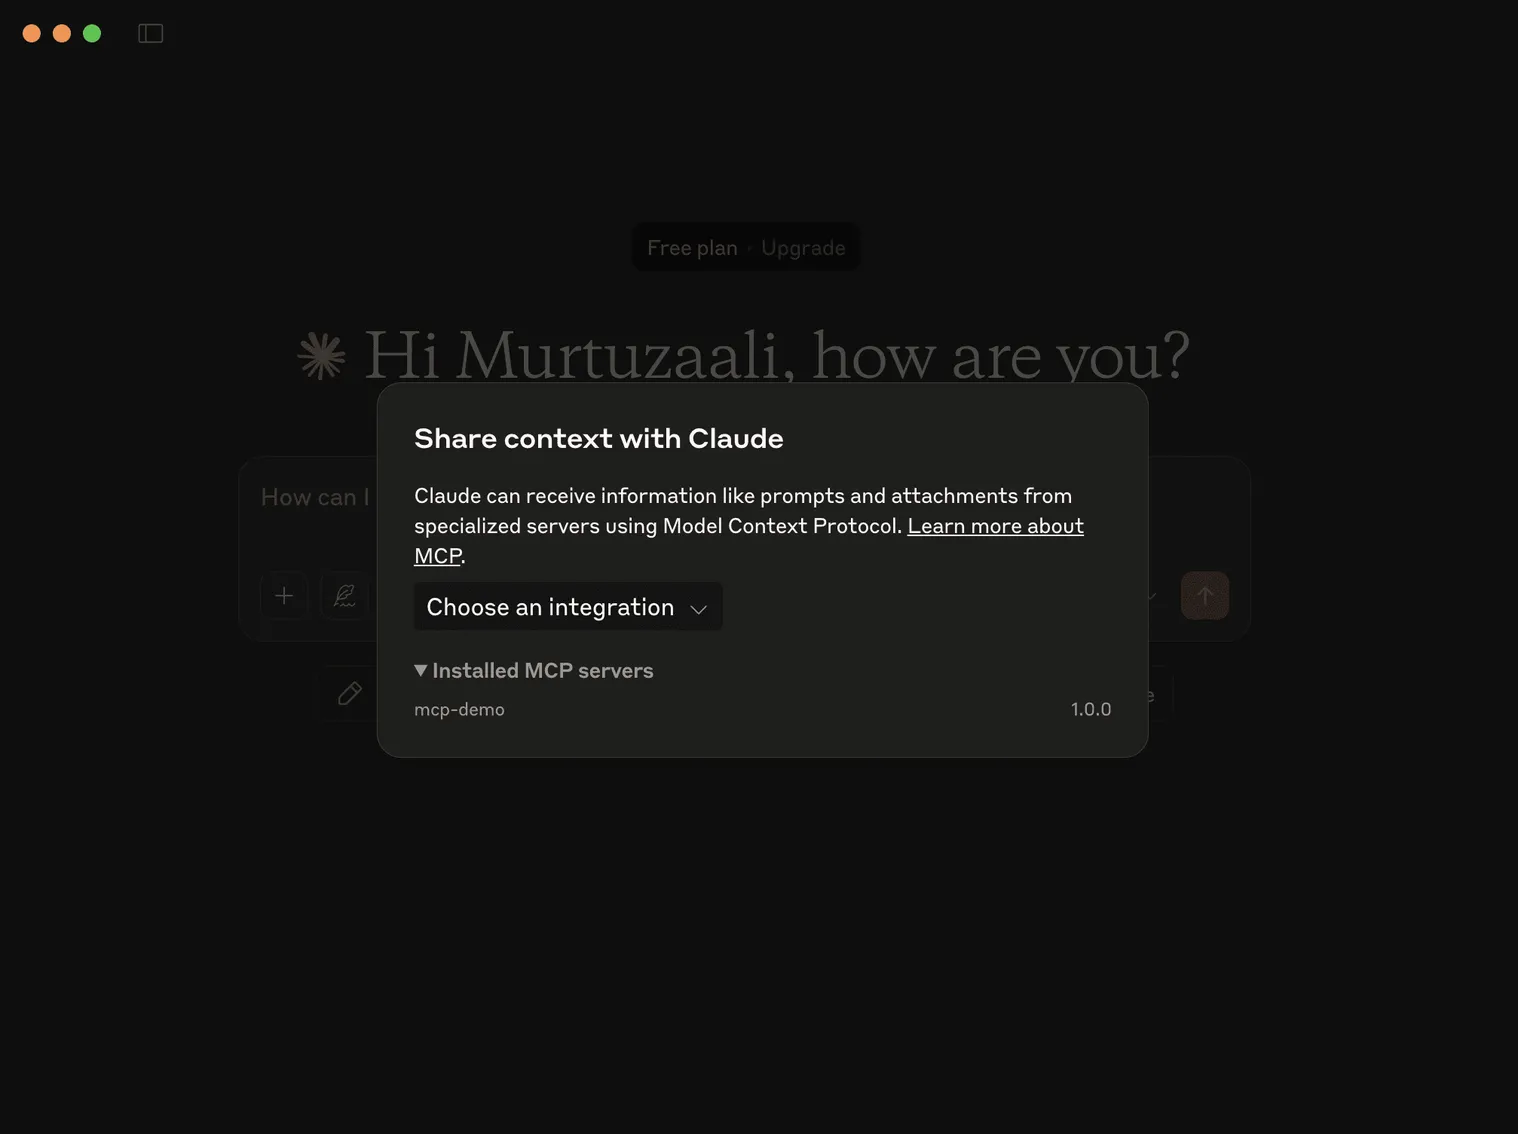
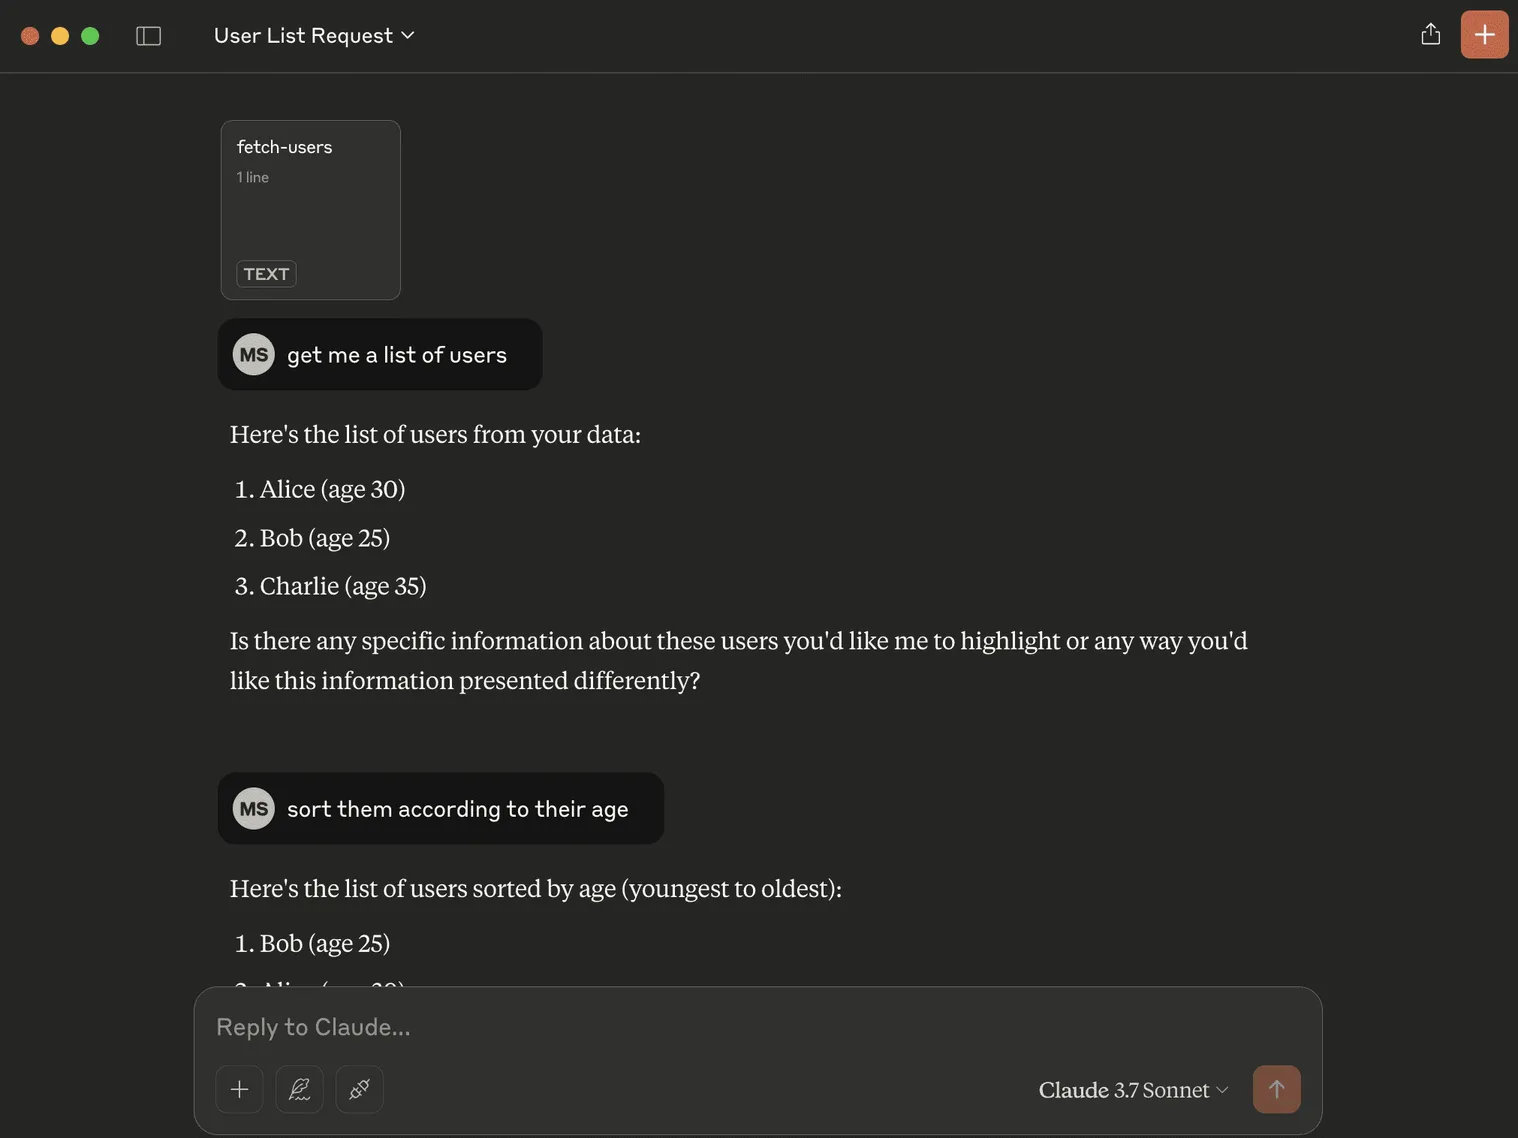
Once you attach a resource to the chat context and tell Claude to retrieve that info in normal human language, it will do so.
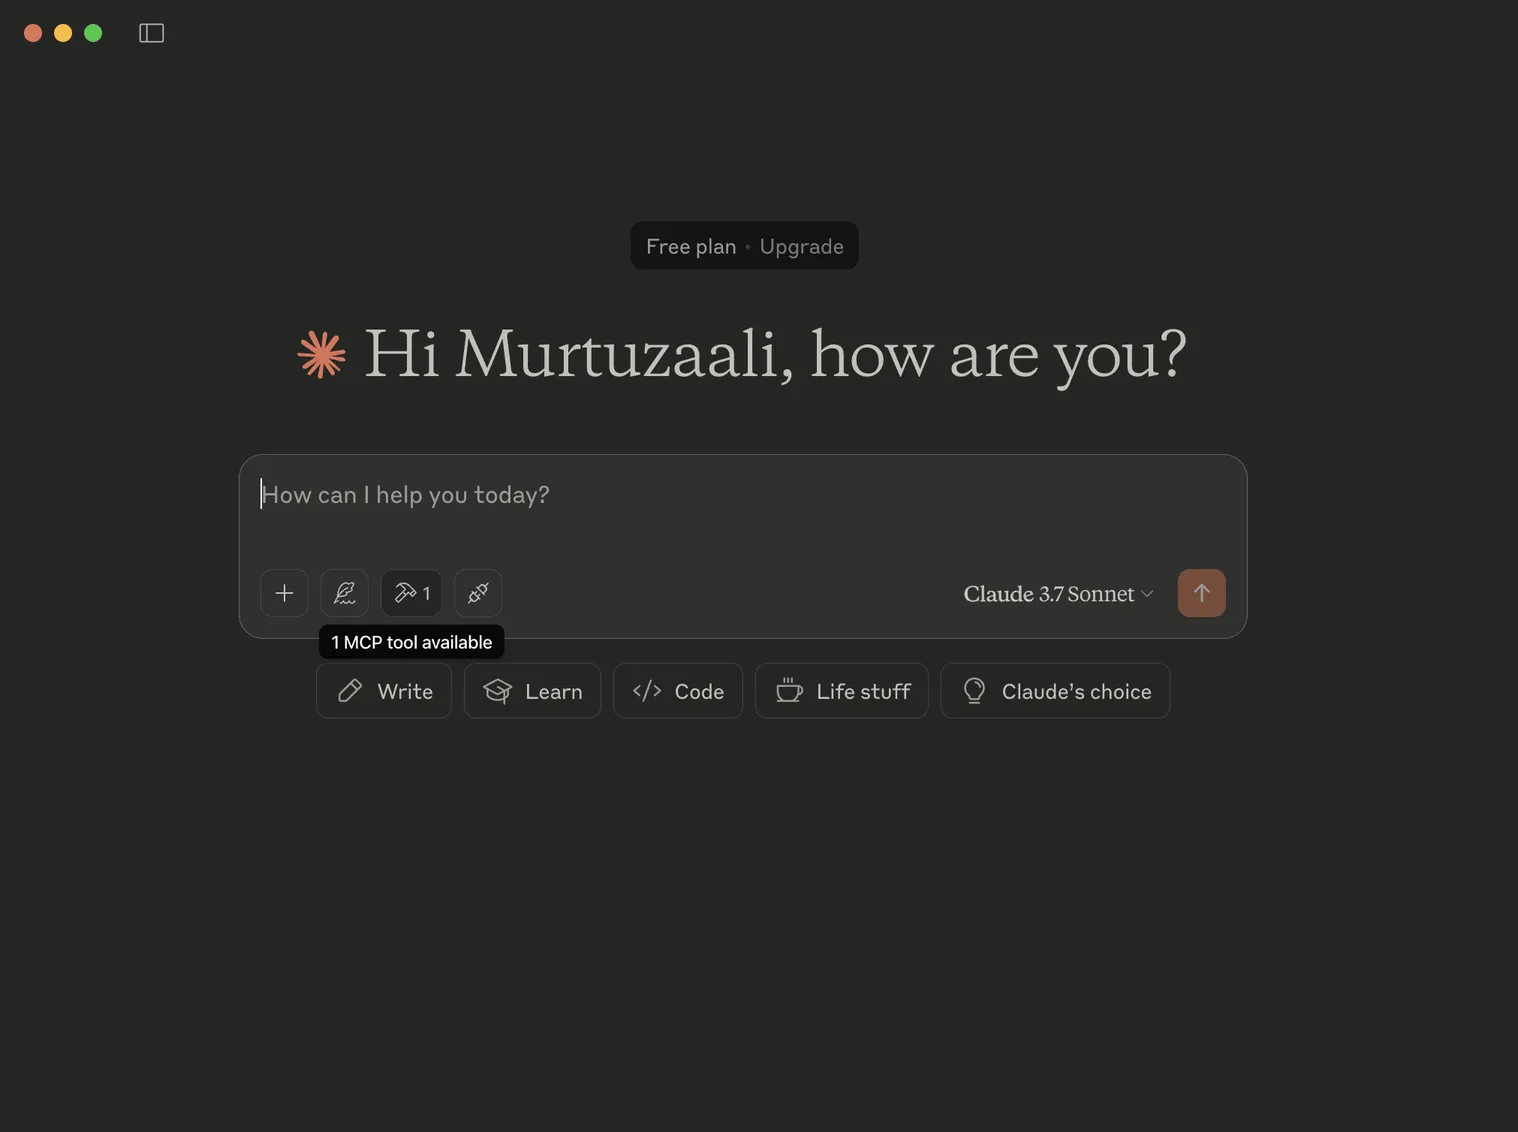
If you define tools in your MCP server, you will see a hammer icon in Claude Desktop depicting that those tools are available to use.
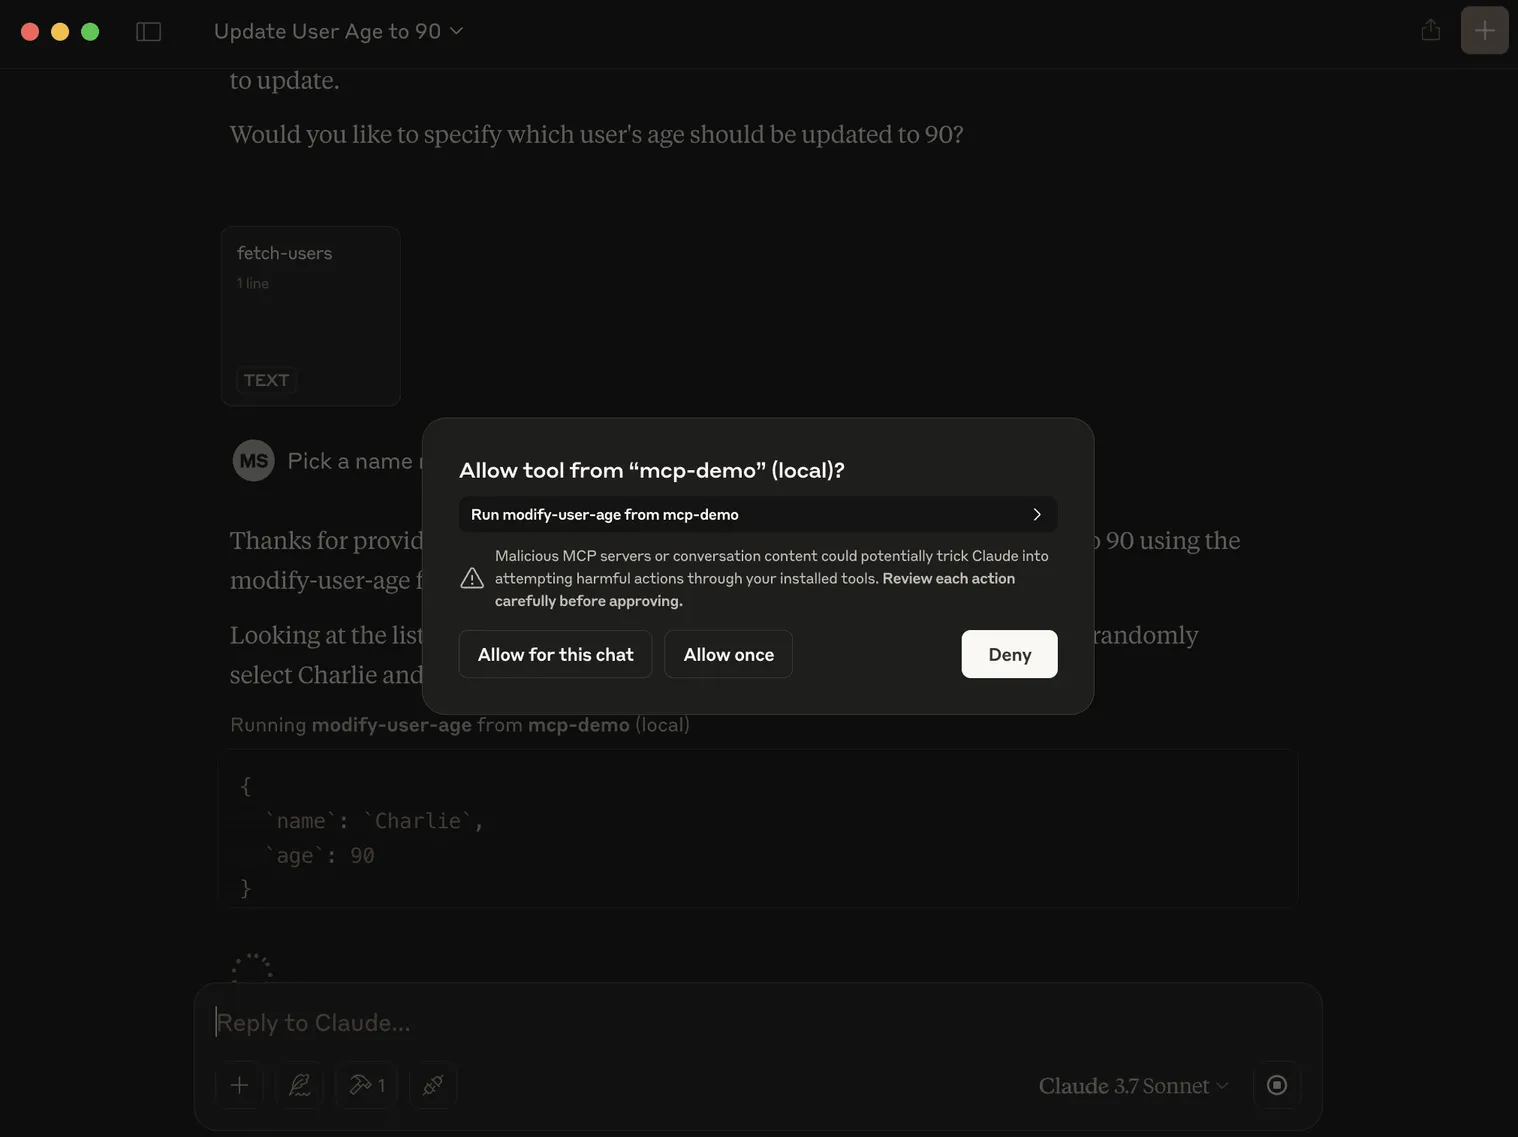
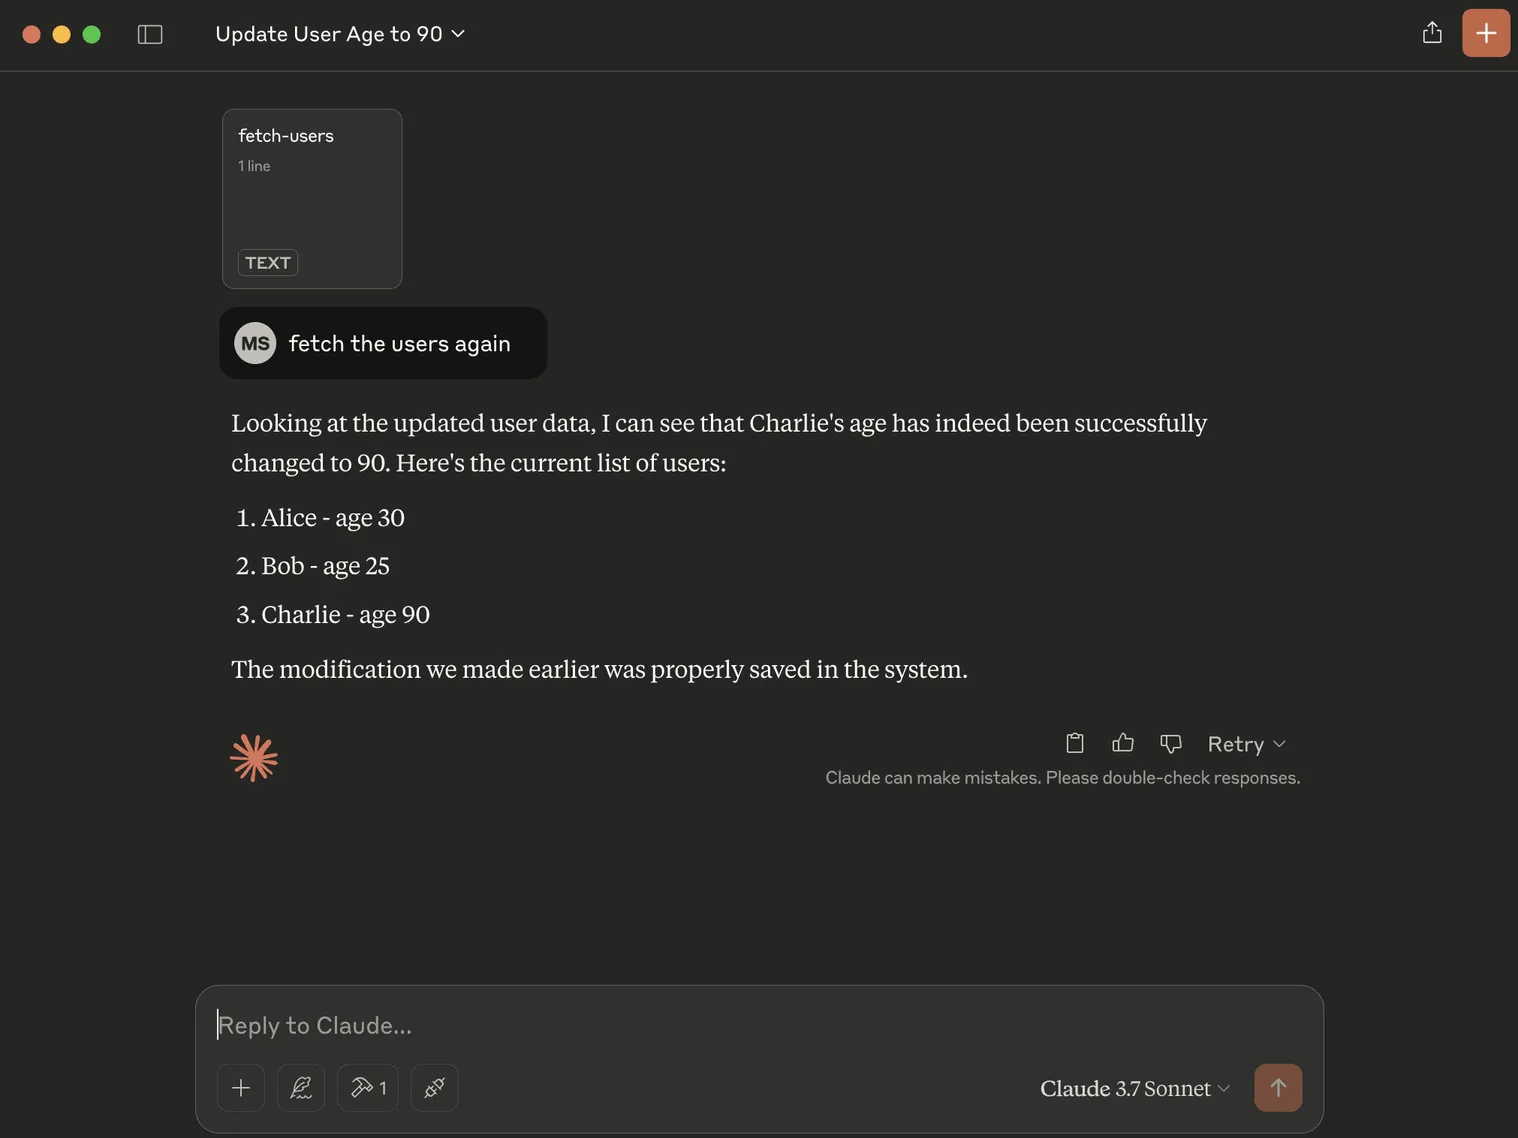
For example, I added a tool which modifies the age of a user in my MCP server and used it in combination with the existing resource which provides a list of users to Claude. Note that you need to attach the resource to the chat context. Also, Claude will ask your permission to modify the data.
const users = [
    { name: "Alice", age: 30 },
    { name: "Bob", age: 25 },
    { name: "Charlie", age: 35 }
]

server.tool(
    "modify-user-age",
    "Modify user age",
    {
        name: z.string(), // install zod: npm i zod
        age: z.number(),
    },
    ({ name, age }) => {
        const user = users.find(user => user.name === name);
        if (!user) {
            return {
                content: [{
                    type: "text",
                    text: `User ${name} not found`,
                }]
            }
        }

        user.age = age;
        return {
            content: [{
                type: "text",
                text: `User ${name} updated to age ${age}`,
            }]
        }
    },
)
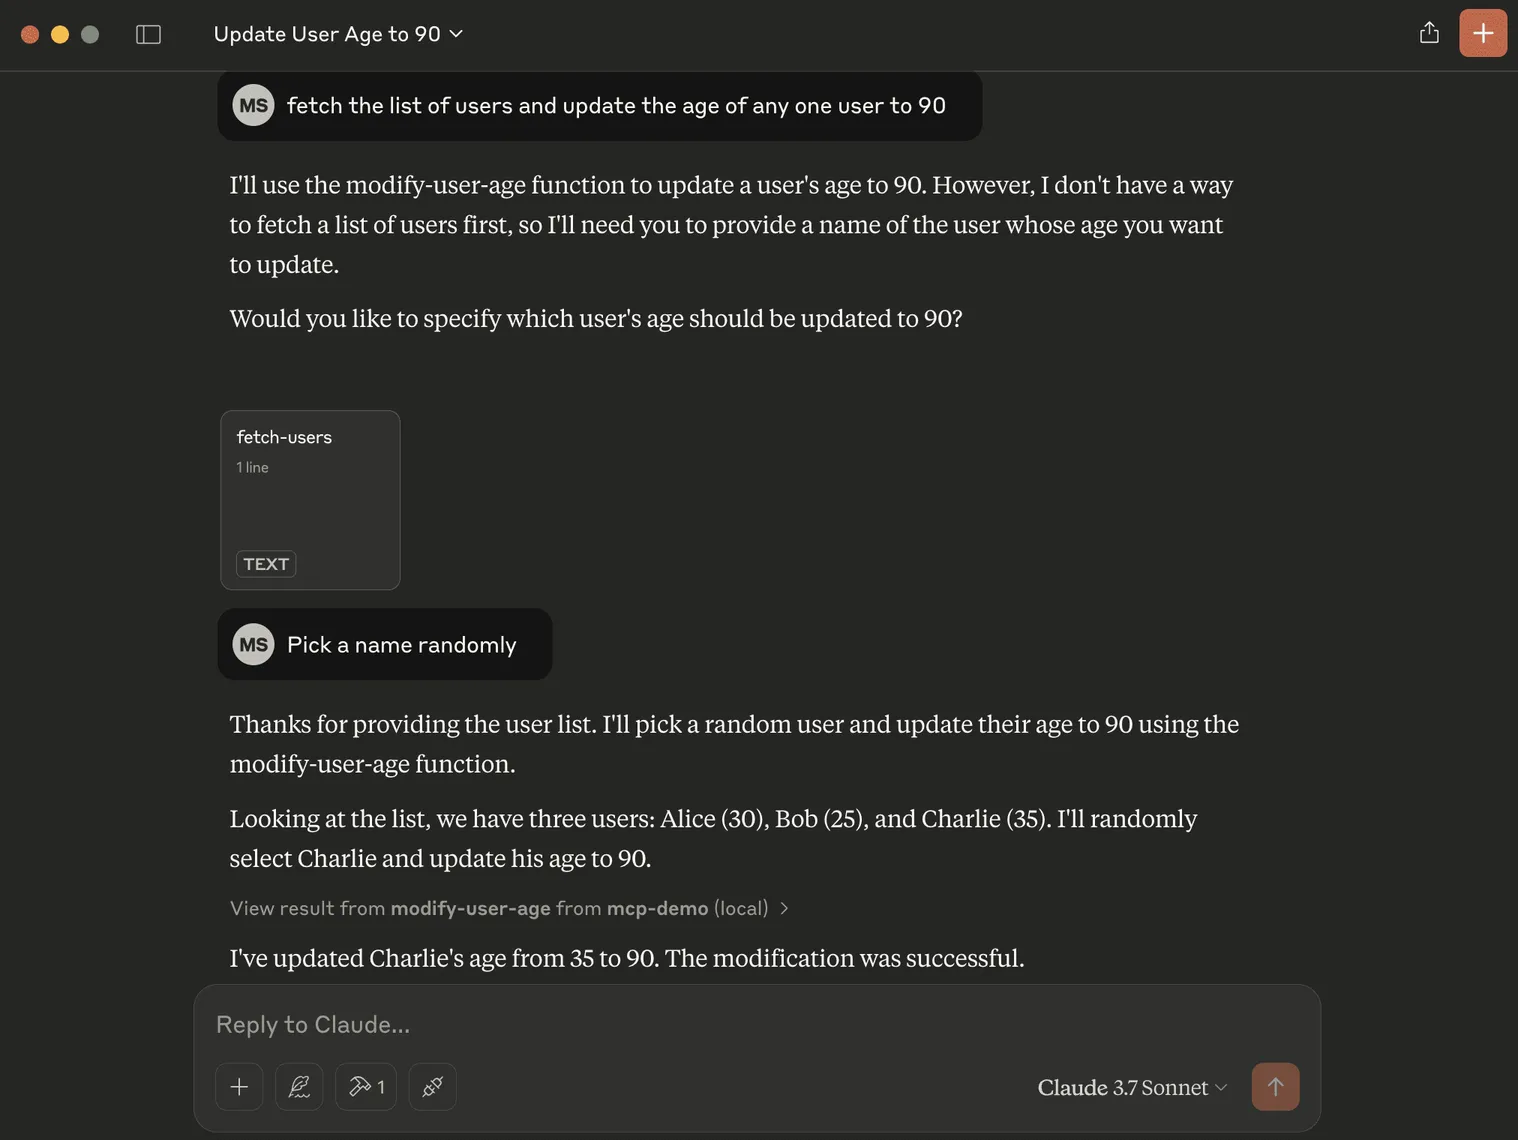
Now, if I ask it again to fetch the list of users (after attaching the resource to chat context), Claude responds with the updated data.
That was all about me building a basic and simple MCP server and integrating it with Claude Desktop (an MCP client).
List of MCP Servers
Here's an inexhaustive list of MCP servers you can try:
- Git MCP
- GitHub MCP
- Google Maps MCP
- Reddit MCP
- Blender MCP
- Da Vinci Resolve MCP
- Google Drive MCP
- Figma MCP
- Prisma MCP
- GitLab MCP
- FileSystem MCP
- Slack MCP
- Brave Search MCP
- SQLite MCP
MCP Server Directories (Registries)
If you want to explore more MCP servers, check out these MCP server directories/registries — they contain a compilation of variety of MCP servers, including community and official MCP servers.
- Official MCP Registry - One can publish/retrieve MCP servers and also build public/private sub-registries.
- Glama
- Cursor MCP Directory
- HuggingFace MCP Server List
- punkpeye/awesome-mcp-servers
- modelcontextprotocol MCP server list
- MCP.so
Thoughts
MCP feels like the HTTP for AI, not in a technical sense, but in a more universal sense. In fact, HTTP is itself a transport method used by MCP. MCP doesn't solve every AI model communication problem, but certainly makes it easier. Some also term MCP as the "USB-C" for AI.
Other protocols such as A2A (Agent to Agent Protocol) make communication between AI agents built using different frameworks easier. This is just the beginning of AI communication protocols and I hope we will see some more powerful, better and privacy-focused AI protocols.